Table of Contents
With the release of Rifthounds and the corrosion effects, shielders are becoming less general and healers are becoming more usable. This is due to the fact that corrosion damage reduces characters HP even if they have a shield. Kokomi not only can heal her allies, but she can also deal damage due to her scaling from maximum HP.
Kokomi is great to add to your collection especially for exploring newer regions and fighting new enemies. When built properly, her kit, along with her weapon and artifacts sets can boost your team’s damage through elemental reactions and particle regeneration. Here you can learn how to optimize her build to reach her peak performance!
Skills
Normal Attack: The Shape of Water
Kokomi performs up to three attacks that deal Hydro damage. Holding will consume stamina and deal AOE Hydro damage. Kokomi’s kit and her main usage depend on other skills more than her normal attack, making this the least priority to level up.
Elemental Skill: Kurage’s Oath
Kokomi summons Bake-Kurage that deals Hydro damage and heals nearby allies. That effect will be triggered every 2 seconds for a total of 7 times. The heal is based on Kokomi’s maximum HP. Currently, healers are becoming more and more essential due to the presence of the corrosion effect, which deals damage over time to your characters.
This allows this skill to be very essential in keeping your allies and setting up elemental reactions such as freeze or vaporize. Thus, this is the highest priority skill to level up.
Elemental Burst: Nereid’s Ascension
Kokomi deals AOE Hydro damage and enters “Ceremonial Garment” status. In this status, her Elemental Skill, normal and charged attacks damage increase based on Kokomi’s maximum HP. Moreover, her normal and charged attacks heal nearby allies while reducing her interruption chance.
Moreover, this Elemental Burst can help in exploration a little since Kokomi can walk on water while the Elemental Burst is active. While this Burst’s heal is good and allows Kokomi to deal damage, its values are less than her Elemental Skill, making the Burst less priority than the Elemental Skill.
Passive: Tamanooya’s Casket
Using the Elemental Burst resets the Elemental Skill’s cooldown.
2nd Passive: Song of Pearls
While Kokomi’s “Ceremonial Garment” status is active, the damage bonus to normal and charged attack is further increased by 15% of healing bonus.
3rd Passive: Flawless strategy
Kokomi gains 25% healing bonus and loses 100% of CRIT Rate.
Weapons
Everlasting Moonglow
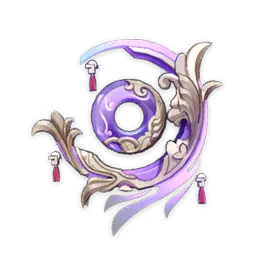
Everlasting Moonglow works best with Kokomi since it improves her strengths even more. Building Kokomi is all about increasing her maximum HP and healing rate.
This is exactly what Everlasting Moonglow does by increasing her maximum HP by 49.6% and her healing bonus by 10-20%.
It also increases the damage of her normal attack by 1% of maximum HP and they restore 0.6 energy.
Prototype Amber
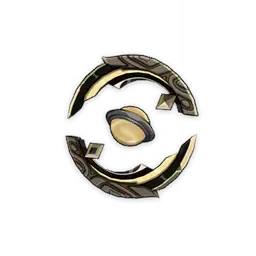
While Prototype Amber gives less HP than Everlasting Moonglow, it is still the second-best weapon for her. Mainly because it still has 41.3% bonus HP, and that it regenerates energy and HP when the user uses their Elemental Burst. Moreover, it can be refined to R5 relatively easily since it is a craftable weapon.
Thrilling Tales of Dragon Slayers
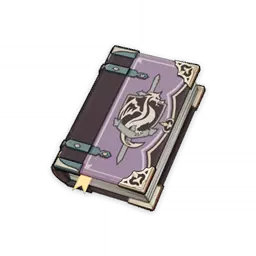
While this weapon is a 3-star weapon, its effect allows it to perform so well with any catalyst support. This weapon gives the teammates 48% attack when its user is switched out. Kokomi can activate her heal and switch out to give her teammates HP and high attack as well.
Artifacts
The best way to use Kokomi is using her to heal her allies. Kokomi scales of maximum HP in both her Elemental Skill and Elemental Burst. Thus, the most important thing to have in artifacts is to have as much HP as possible. However, Ocean-Hued Clam‘s bonus can deal massive damage by just healing her allies, making it the best set for Kokomi.
Build: Ocean-Hued Clam
| Flower | Plume | Sands | Goblet | Circlet | Substats |
|---|---|---|---|---|---|
| 1. HP | 1. ATK | 1. HP % | 1. Hydro DMG Bonus % | 1. HP % | 1. HP % 2. Energy Recharge 3. Elemental Mastery |
Another way to build Kokomi is to build her hybrid. She can scale her damage through her maximum HP while healing more. However, it is important to note that she loses 100% of her crit rate, so crit rate and damage are practically useless. Thus, two pieces of Heart of Depth and two pieces of Ocean-Hued Clam can allow her to both deal damage while healing her allies fairly well.
Also Read: Best Settings For Genshin Impact: Get The Highest Performance And Graphics.
One replacement that can be made is to replace Ocean-Hued Clam with Tenacity of the Millelith. This can be done to add even more 20% HP to Kokomi, which in turn will increase her heal and damage.
Build: Heart of Depth/Ocean-Hued Clam or Tenacity of the Millelith
| Flower | Plume | Sands | Goblet | Circlet | Substats |
|---|---|---|---|---|---|
| 1. HP | 1. ATK | 1. HP % | 1. Hydro DMG Bonus % | 1. HP % | 1. HP % 2. ATK % 3. Energy Recharge 4. Elemental Mastery |
Team Comps
When setting up Kokomi, she can practically fit in any team comp as their sustainer/healer. However, she can be optimized even further by using her Hydro element for reactions. She can be set up with an Electro user to Electro-charge enemies and set up a third reaction.
Another option is to pair her with a Cryo user to create a Perma freeze comp. The last option is with a Pyro user for extra damage since the Evaporate reaction deals twice the damage.
Klee

Klee can synergize so well with Kokomi due to the increase in attack and Evaporate elemental reaction. Not only that, her Elemental skill can apply multiple instances of Elemental reaction, dealing even more damage in the process.
Not only that, Kokomi can regenerate particles to Klee and keep her alive through her heals.
Ganyu

Using Kokomi’s Hydro reaction, she can be used in Ganyu’s Perma freeze comp. Kokomi’s Elemental Skill alone can apply Hydro element for 12 seconds which can be used to freeze enemies with Ganyu.
Also Read: Best Ganyu Build: Weapons, Artifacts & Team Comps.
Moreover, Since Ganyu has lower HP than average, she can really benefit from the constant healing to ensure she stays alive.
Ayaka

Ayaka can also use Kokomi’s Elemental skill to Perma freeze her enemies. Moreover, Kokomi’s particle generation can help Ayaka use her Elemental Burst faster since Ayaka has a high Burst cost.
Not only that, if Kokomi uses Thrilling Tales of Dragon Slayers, Ayaka will deal even more damage due to the 48% attack buff.
Raiden Shogun

Raiden Shogun can be paired with Kokomi to set up an Electro-charged reaction, in which the Electro element will be conducted to all nearby enemies.
Also Read: Best Raiden Shogun Build: Weapons, Artifacts & Team Comps.
Not only that, Raiden Shogun can help Kokomi charge her Elemental Burst faster, which will heal your team faster and keep them alive. All while increasing Raiden’s Burst damage due to Kokomi’s high Burst cost.
Constellation
| At water’s edge | While Kokomi’s “Ceremonial Garment” status is active, her last normal attack deals 30% of her maximum HP as Hydro damage |
| The clouds like waves rippling | If allies HP is below 50%, Kokomi’s heals gain the following bonuses: 1. Her Elemental skill heals an extra 4.5% of Kokomi’s maximum HP 2. While Kokomi’s “Ceremonial Garment” status is active, her normal and charged attack heals an extra 0.6% of Kokomi’s maximum HP |
| The moon, a ship O’er the seas | Increases the level of the Elemental Burst by 3 and the maximum level to 15 |
| The moon overlooks the waters | While Kokomi’s “Ceremonial Garment” status is active, she gains extra 10% attack speed. Moreover, her normal attacks will restore 0.8 energy to her (0.2-second cooldown) |
| All streams flow to the sea | Increases the level of the Elemental Skill by 3 and the maximum level to 15 |
| Sango Ishhin | While Kokomi’s “Ceremonial Garment” status is active, if her normal and charged attacks heal an ally by 80% or more HP, she will gain 40% Hydro damage bonus for 4 seconds |
One great aspect about Kokomi is that none of her constellations lock her true potential. While they are beneficial, they are not necessary to make her heals useful. Thus, her C0 can be more than sufficient.
However, if a higher constellation is desired, C2 can boost her heal even further and make her team almost invincible.
While the community is looked down upon by the community, she is, by all means, a very useful character to have especially with the newer enemies such as Rifthounds. Her particle generation and heals allow her to be a great support while being able to deal damage due to her Maximum HP scaling.
All image copyrights belong to Mihoyo, Genshin Impact fandom, and Genshin honeyhunterworld.
